we get a perfect copy of our candle, upside down, on our film
How it works - Size of the Pinhole
Fundamental Law: Light travels in a straight line
Under ideal conditions the light reflecting or emitting from one part of an object we wish to image can only fall on one location on our film.
we get a perfect copy of our candle, upside down, on our film
However, the world is not perfect [I know this comes as a shock to all of you.]
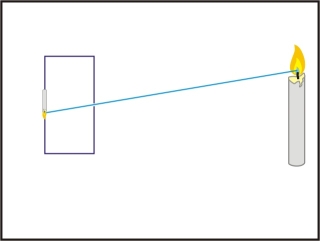
In the above example I will reduce the rays to just the one coming from the center of the flame:
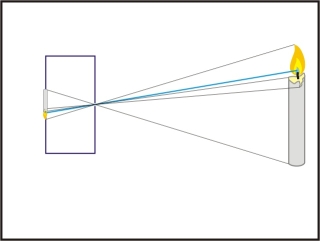
Now I will enlarge the size of the pinhole [actually rediculously large for a real camera, but hey, these are cartoons]:
As you can now see, there is space around our ray going through the center of the pinhole. What this means is that the ray is no longer restricted to just the center and can wander over the rest of its new range:

What was once a nice tiny pinpoint image of the center of the flame has expanded to cover a much large area. In real world terms, the image is now very blurry.
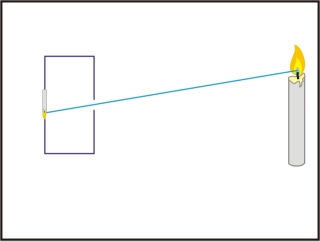
RULE #2: The smaller the pinhole, the smaller this 'circle of confusion' and the sharper the image.
 large pinhole
 smaller pinhole
 even smaller pinhole
Rule #3: Rule #2 has a limit, called the diffraction limit. The limit is because under the right condition, light can break Rule #1, light always travels in a straight line.
What this means is that when we expect to get:
 From an even smaller pinhole
What we actually get is:
A blurrier image
Pinhollers will debate exactly where this point is and some, such as this author, will go to great lengths to achieve the "Ideal" pinhole size.
"Life is not fair." President Jimmy Carter
See formula sections for calculators for determining the ideal pinhole OR learn to embrace the fuzzy nature of existence and not worry about it.
Remember, you also lose light when the hole gets smaller as a smaller hole lets less light in. Most pinholler consider this an asset though. This is what makes for the wonderful time dilations. See What is an F-stop.